
Most CoinGecko API guides start the same way. You get a wall of Python code, a Docker setup, a GitHub repo link, and by the end, you have a script that fetches prices and does absolutely nothing with them. So if you came here looking for a CoinGecko API trading bot you can actually run, you’re in the right place.
In this article, I’ll show you what CoinGecko API data is useful for in a signal bot setup, where the DIY approach breaks down, and how you can connect CoinGecko to Finestel’s Signal Bot without any coding. I’ve set it up myself, and you can replicate the exact setup with the screenshots below.
What Is CoinGecko API?
If you don’t already know, CoinGecko is one of the largest crypto data aggregators in the world. It tracks millions of assets across 1,700+ exchanges and 250+ blockchain networks. Now, the CoinGecko API gives you programmatic access to all of that data. You can extract and work with real-time or historical prices and charts, market cap, volume, and even on-chain DEX pool data.

But you might ask what is different between this and a standard exchange API. Well, if you pull data from Binance’s API, you can obviously only see what’s trading on Binance. But the case for the CoinGecko API is that you get aggregated and normalized data across virtually every existing CEX and DEX. That’s why you can build a multi-source crypto signal bot with CoinGecko.
What CoinGecko Data Can Actually Power a Signal Bot?
The CoinGecko API connection covers a lot of ground. However, not all of it is equally useful for trading signals. But, the ones I explain below are what I personally consider the best data categories you can base your CoinGecko API trading bot on.
| Endpoint | Data | Signal Use Case | Plan Required |
| /simple/price | Live token prices | Baseline price monitoring | Demo (free) |
| /coins/markets | Market data + 24h volume | Volume spike detection | Demo (free) |
| /search/trending | Trending coins | Early momentum signals | Demo (free) |
| /coins/top_gainers_losers | 24h top movers | Momentum entries | Analyst ($129/mo) |
| GeckoTerminal pools | On-chain DEX data | Early-stage token moves | Demo (free) |
- Real-time prices are the obvious ones to go with. The /simple/price and /coins/markets endpoints give you live prices for any coin, and they’re updated in near real time. This is the baseline data layer most Coingecko signal bots are built on.
- Top Gainers & Losers is where it gets interesting for momentum strategies. This endpoint shows the coins moving hardest in either direction over the last 24 hours. It’s only available on the Analyst plan and above, but if you’re running a momentum-based strategy, it’s worth it.
- Trending coins via /search/trending shows you what’s gaining traction across CoinGecko before the move is obvious. Think of it as an early warning signal, as coins showing up here tend to attract volume shortly after and even show up on Top Gainers and Losers.
- Volume spikes are another piece of data you can use. It’s not a dedicated endpoint, but you can pull 24-hour volume data from /coins/markets and filter for coins where volume has jumped abnormally relative to their average. Unusual volume is one of the cleaner early signals in crypto.
- On-chain DEX data through GeckoTerminal is also interesting. It gives you pool-level data across 250+ blockchain networks. If your strategy targets early-stage tokens before they hit major CEXs, you can build your CoinGecko API trading bot using this data.
For more information, check out the CoinGecko API documentation.
The Problem With DIY CoinGecko Trading Bots
As I mentioned earlier, every “build a CoinGecko trading bot” tutorial on GitHub or Reddit follows a similar pattern. I mean, you set up a Python environment, install dependencies, call a CoinGecko endpoint, and print some prices to a console. The tutorial ends there and calls it a bot. But that’s just a data fetcher.
To turn a plain CoinGecko trading signals alert bot into something that actually trades, you still need to build the exchange integration from scratch. You need separate API connections for Binance, Bybit, or whichever exchange you’re using. Then you need order logic. How does a price movement translate into a buy or sell? What size? With what risk parameters?
Then there’s error handling, because exchange APIs fail, rate limits can get hit, and network timeouts happen constantly in production. Logging can also be an issue, because you should know what your bot actually did. There are also maintenance tasks as CoinGecko updates its endpoints and exchanges change their APIs. Your bot can break quietly in the background while you’re not watching.
And after all of that, you’ve built a single-source bot. If CoinGecko has downtime, and you can check live status at status.coingecko.com, your entire setup goes dark. There’s no fallback.
I’m not saying it can’t be done. Plenty of developers run a custom CoinGecko API crypto signals bot. But if you’re not a developer, or you just don’t want to spend weeks building infrastructure instead of trading, there’s a faster path. You use a signal bot that already has all of that built, and just plug CoinGecko in as the data source.
Finestel’s Signal Bot for CoinGecko API Trading
The solution I’m introducing here is Finestel’s Signal Bot. It’s built around a multi-source architecture. That means it doesn’t care where your signal comes from. It can be TradingView, Telegram, a Python script, an n8n workflow, IFTTT, or other sources. As long as the signal arrives at the webhook URL, the bot picks it up and executes the trade. CoinGecko is just one of those sources.
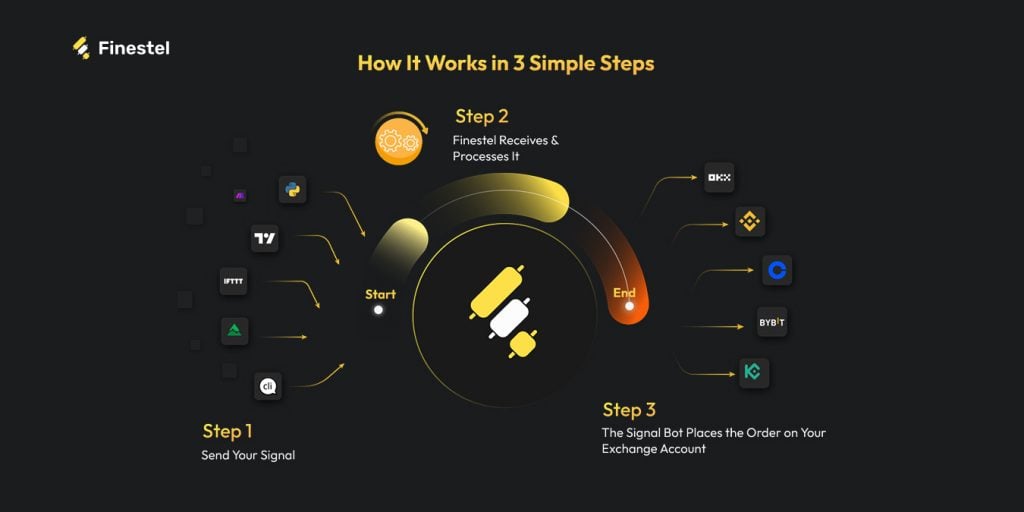
Every bot you create gets its own unique webhook URL. Any system that can send a POST request, like a Python script or a custom automation, can trigger it. You should just point your CoinGecko data source at that URL, and Finestel handles the execution side completely.
Setting it up is also quite easy. I’ll explain how to connect your Coingecko API trading bot to the Finestel signal bot in the next section. Once the bot is live, Finestel gives you a webhook URL and a pre-built JSON payload through the built-in Webhook JSON Generator. Instead of figuring out the payload structure yourself, it builds it for you. I mean, the exchange name, action, symbol, order size, order type, take-profit levels, bot ID, and the secret key are all pre-filled and ready to copy.
Now, to handle the executions, Finestel connects to Binance, Bybit, OKX, KuCoin, Bitget, Gate, and Kraken. You’ll have access to trailing stops and multi-level take-profits with up to four staged exits. It also supports both spot and futures. And, if you’re managing more than one account, the same signal fires across all of them simultaneously, and each with its own size multiplier.
What makes this setup better than a DIY bot is that the infrastructure is already there. You’re just connecting CoinGecko as a data source and letting the bot do what it was built to do.
From Signal Bots to Portfolio Management
Most traders start with the signal bot, but a lot of them don’t stop there. The copy trading software lets you mirror trades across multiple exchange accounts in real time, which is useful if you’re running client portfolios or managing separate strategies.
Moreover, for those who want to take it further, Finestel also offers a white-label solution, which lets you run the entire platform under your own brand. I mean, your clients see your interface, not Finestel’s. And if you need to place and monitor orders manually across accounts, the trading terminal handles that too, with bulk order execution and multi-account management.
So, depending on where you are as a trader, Finestel can be just a signal bot, or it can be the entire crypto asset management infrastructure.
Finestel currently holds a 4.7/5 rating on Trustpilot, with over $10 billion in trading volume processed. For a signal bot handling live funds, that track record matters more than a GitHub repo with 200 stars.
Step-by-Step: How to Connect CoinGecko API to Finestel Signal Bot
Here’s the exact setup I walked through to build a CoinGecko API trading bot with Finestel. The Finestel side takes about ten minutes. What you do with the CoinGecko data on your end is up to you. However, the execution layer is what I’ll cover here in full.
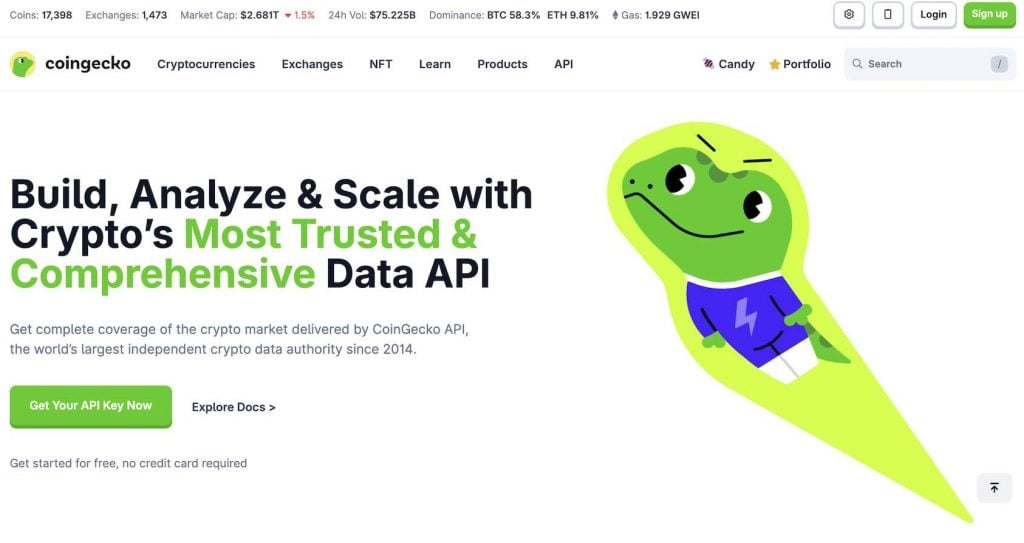
Step 1: Get your CoinGecko API key
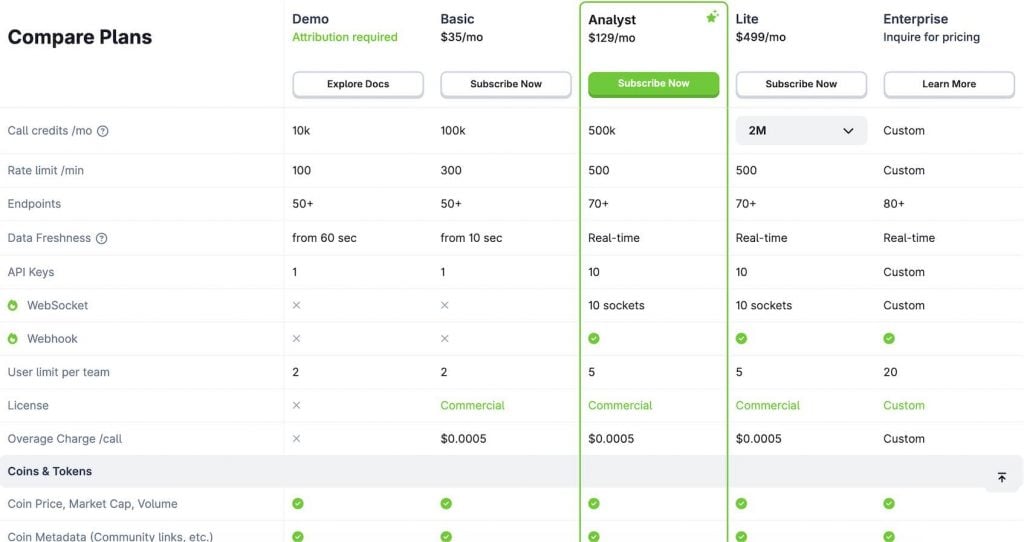
Head to coingecko.com/en/api and sign up for a free Demo key. The free tier gives you 10,000 call credits per month and a rate limit of 100 calls per minute, with data freshness starting from 60 seconds. That’s enough for most CoinGecko signal bot setups running on a reasonable polling interval. Copy the CoinGecko API key and keep it somewhere safe. Remember, you’ll need the key in whatever script or automation you use to pull the data.
Step 2: Create your Finestel account
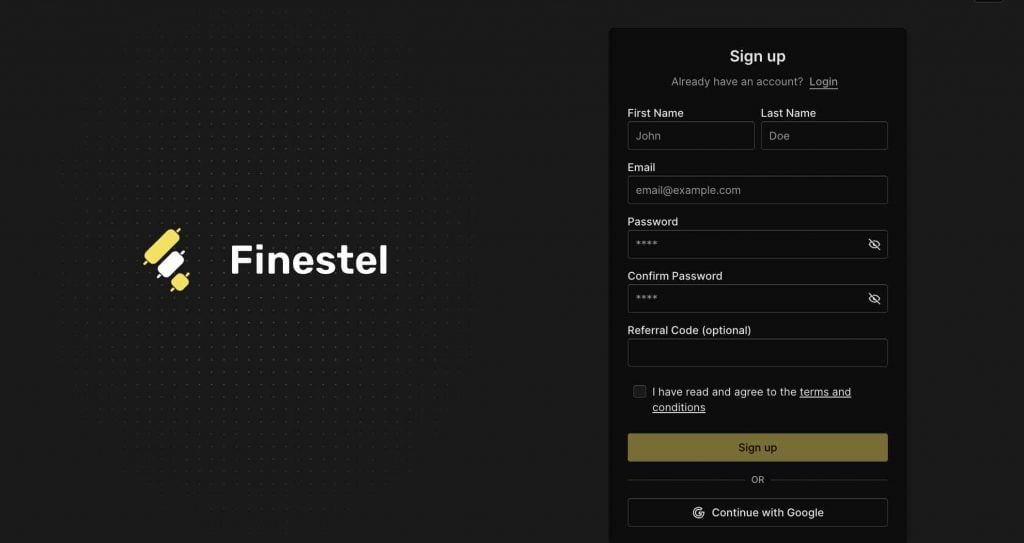
Go to finestel.com and sign up. It’s a standard registration. Enter your name, email, and choose a password. You can also continue with Google if you prefer.
Step 3: Create your Signal Bot
Once you’re in, navigate to Signal Bot from the left sidebar and hit Create. You’ll land on a clean settings screen. At this point, it’s empty. There’s just a name field, an account selector, and toggles for Take Profit and Stop Loss, both off by default.
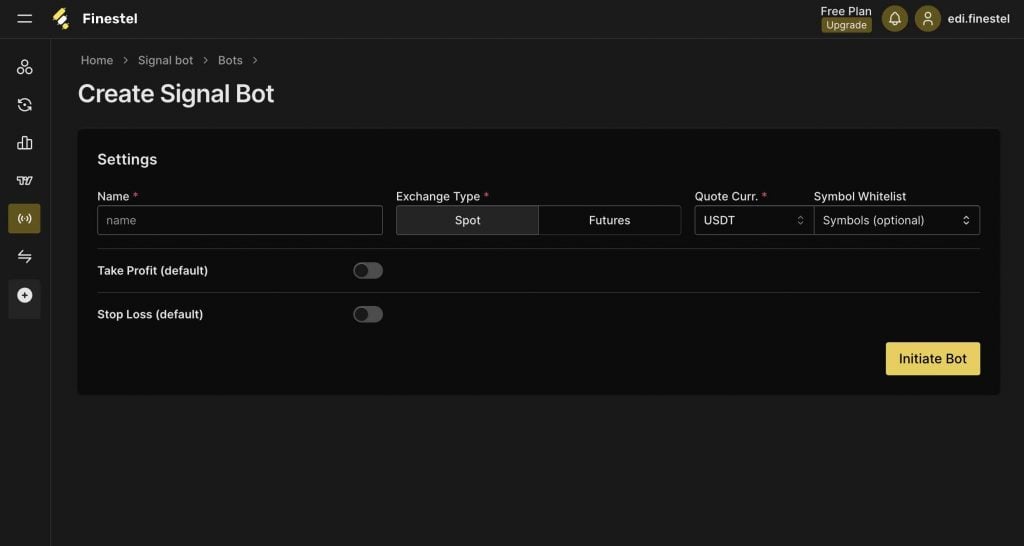
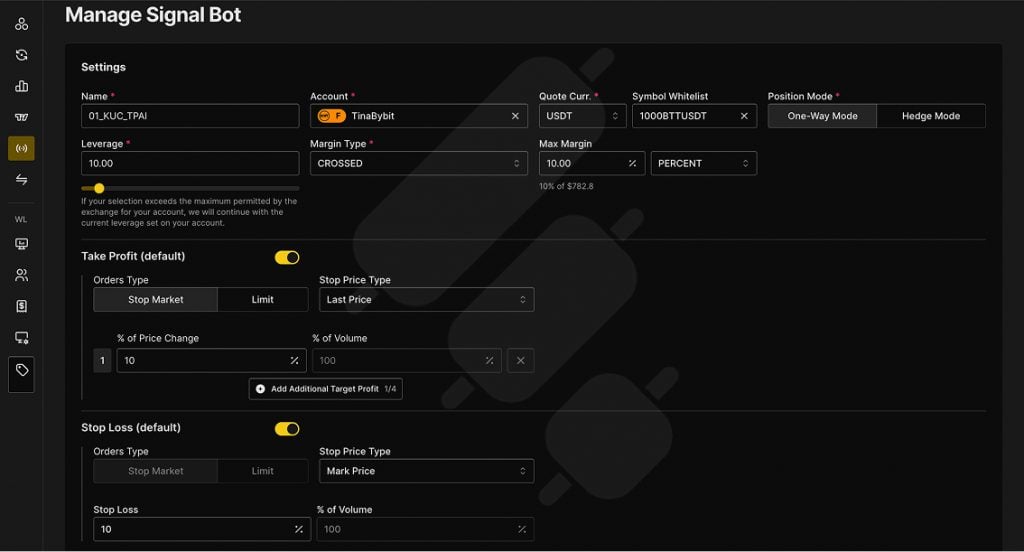
Step 4: Configure your bot settings
This is where you set the actual parameters. Give your bot a name, connect your exchange account, set your quote currency, and decide on your position mode, which can be either One-Way or Hedge. Then configure your default Take Profit and Stop Loss. These apply to every signal the bot receives, so even a minimal payload is always covered. Click on Initiate Bot when you’re done.
Step 5: Build your webhook payload
Once the bot is created, you’ll see the Webhook JSON Generator. Instead of writing the JSON payload yourself, Finestel builds it for you based on your inputs, like action, symbol, order size, order type, margin settings, and sequential logic fields if you need them.
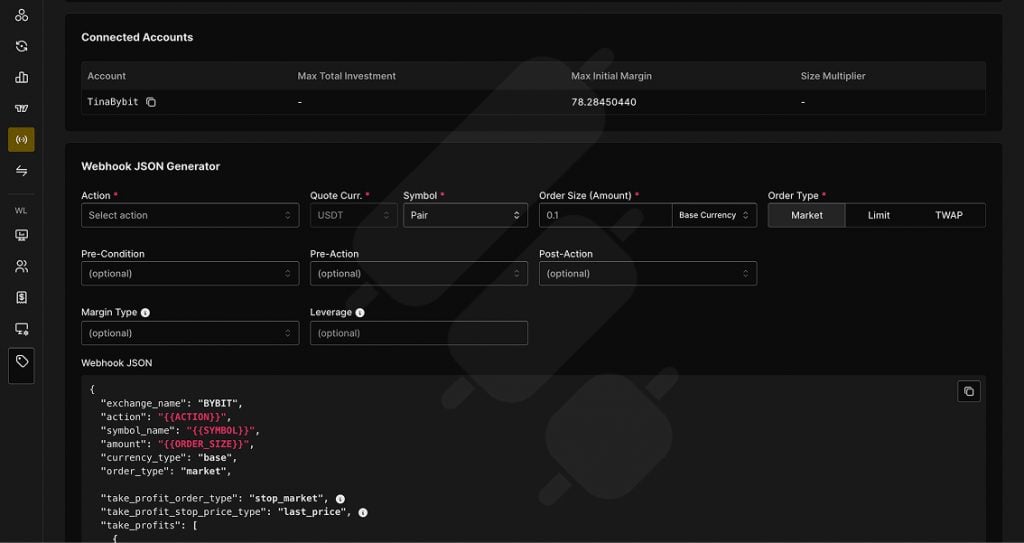
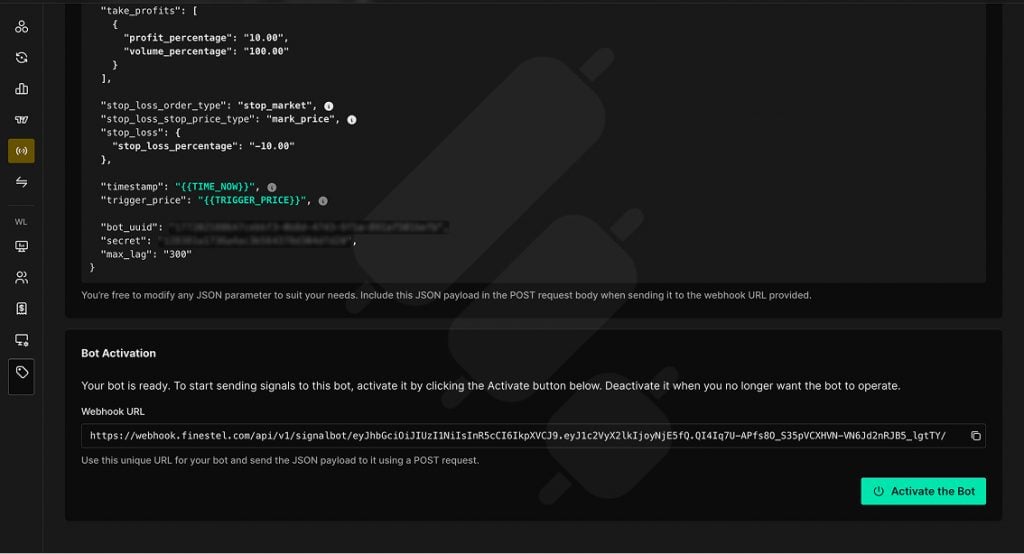
Select your parameters, and the generator produces a complete, ready-to-use JSON structure below. The bot_uuid and secret fields are already filled in with your bot’s unique credentials. Copy the full payload. This is what your CoinGecko script will send to Finestel when a signal fires.
Step 6: Copy your webhook URL and activate
Scroll down to the Bot Activation section. Here you’ll find your unique webhook URL, which is the endpoint your CoinGecko automation posts to. Copy it, then hit Activate the Bot.
Step 7: Point your CoinGecko data source at the webhook
With your webhook URL and JSON payload in hand, the last step is connecting your CoinGecko data source. Whatever tool you’re using to poll the API, you configure it to send the copied JSON payload to your webhook URL whenever your signal conditions are met. Finestel validates the credentials on arrival and places the order instantly.
The actual flow looks like this. Your script polls a CoinGecko endpoint on a schedule, checks the response against your conditions, price change above 8%, volume spike, whatever your strategy requires, and when conditions are met, fires a POST request to your Finestel webhook URL with the payload.
One thing worth noting is the symbol mapping. CoinGecko returns identifiers like "btc" while Finestel expects the exchange trading pair format, like"BTCUSDT" on Bybit or Binance. Handle that conversion in your script before sending the payload. Everything else stays static.
From here, the bot runs on its own. Duplicate signals get filtered, stale payloads get dropped, and every trade executes with the risk rules you set in Step 4 automatically.
Why Multi-Source Beats Single-Source for Signal Quality
Using CoinGecko as your only signal source works. But it has a ceiling. CoinGecko gives you price data, volume, trending coins, and market-wide momentum. But what it doesn’t give you is technical confirmation. For example, a coin can show a 15% volume spike and still be in a clean downtrend on the chart. If you run that alongside a TradingView RSI or moving average crossover, and you’re only entering when two independent systems agree, which filters out a significant portion of false signals before they ever reach execution.
The same logic applies in other directions. Pair CoinGecko’s trending coins data with on-chain activity from a wallet tracker, and you’re catching momentum moves that have both market-wide interest and actual capital flowing behind them. One signal confirms the other. The setup becomes more selective, and more selective usually means fewer trades but better ones.
There’s also a resilience argument. A single-source bot lives and dies with that source. If CoinGecko has downtime, your strategy stops completely. If you’re running CoinGecko alongside TradingView alerts or a custom on-chain feed, one source going quiet doesn’t kill the setup.
Finestel’s multi-source architecture is built for exactly this. All your signal sources, like CoinGecko data, TradingView alerts, Telegram signals, and custom scripts, feed into the same bot and execute through the same webhook. It all runs in one place, across as many exchange accounts as you need.
CoinGecko API Pricing
The free CoinGecko Demo key gives you 10,000 call credits per month at 100 calls per minute. That’s enough for testing your setup and validating your strategy. However, where it starts to show limits is data freshness. The CoinGecko Demo plan updates from 60 seconds, which is fine for swing-style strategies but too slow if you do momentum plays. The Analyst plan at $129/month is where it gets serious, as you’ll have real-time data, WebSocket support, and access to 70+ endpoints.
Now, in my opinion, it’s always better to start free, validate the strategy, then upgrade when you’re ready to run it live. And for what it’s worth, CoinGecko’s Analyst plan combined with Finestel still comes in cheaper than most full-service trading platforms, with considerably more control.
CoinGecko API Alternatives
If you’re evaluating data sources for your signal bot, CoinGecko API trading isn’t the only option. Here’s how the main alternatives stack up.
| Data Source | Coverage | Free Tier | DEX Support | Best For |
| CoinGecko | 20M+ assets, 1,700+ exchanges, 250+ chains | Yes | Yes | Full market scanning |
| CoinMarketCap | Similar breadth | Yes (restrictive) | Limited | CEX-focused strategies |
| Binance API | Binance only | Yes | No | Binance-specific setups |
| Coinbase Market Data | Coinbase only | Yes | No | Coinbase-specific setups |
As I’ve mentioned earlier, CoinGecko’s edge is breadth. For a signal bot that needs to scan the full market, and not just one exchange, nothing else covers the same ground at the same price point. That said, Finestel’s Signal Bot connects to any of these the same way. If you prefer a different data source, the webhook architecture doesn’t change, as you’re just swapping the data layer.
Conclusion
CoinGecko API is one of the best data sources available for a crypto signal bot. The breadth of coverage and the free entry point make it great for building signal strategies. Yet, the missing piece for a full-on CoinGecko API trading bot has always been execution. The setup I’ve walked through here closes that gap, as CoinGecko handles market data while Finestel’s signal bot handles the execution. The two connect through a webhook that takes about ten minutes to configure.
If you want to try it, Finestel offers a 7-day free trial. I’d recommend starting on CoinGecko’s free Demo plan, getting the webhook flow working end-to-end, and validating your signal logic before upgrading anything. If you have any questions about the setup or run into anything along the way, drop them in the comments or reach out via the Contact page.


Leave a Reply